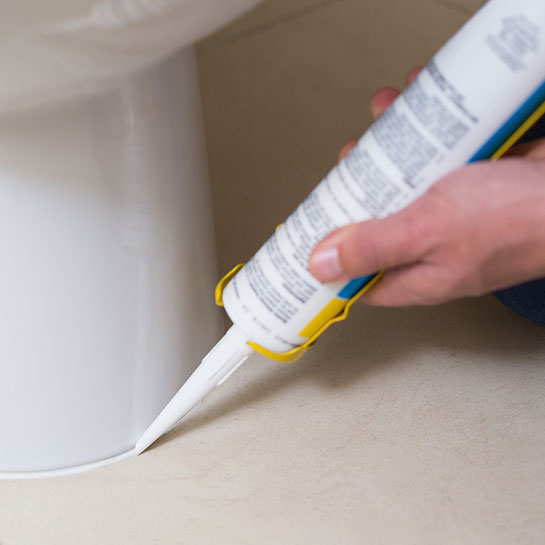
Applying silicone in the bathroom is a key task to prevent water leaks and keep surfaces free of moisture. Although it may seem complicated, it is a simple process that anyone can do with the right tools and following a few basic steps. In this post, we explain how to put silicone in the bathroom correctly, from choosing the right type of silicone to applying it step by step.
What is silicone and why is it used in the bathroom?
Silicone is a flexible, water-resistant material commonly used in the bathroom to seal joints and prevent leaks. Its waterproofing properties make it an ideal solution for protecting areas prone to moisture buildup, such as tub surrounds, shower trays and sinks. In addition, silicone is often formulated with fungicides that help prevent mold and mildew, keeping the bathroom clean and odor-free.

Types of silicone recommended for baths
When it comes to sealing the bathroom, not all silicones are the same. It is important to choose a type that is suitable for wet areas and offers good long-term resistance.
- Sanitary silicone: This is the best choice of silicone for the bathroom, as it is designed to withstand high humidity environments and comes with anti-fungal properties that prevent the growth of mold and mildew. It is highly flexible, making it perfect for withstanding movement or vibration of sealed surfaces, such as shower trays.
-
Silicone formats: You can find silicone in two formats:
- Tube: Ideal for those who are inexperienced, as it is more manageable.
- Cartridge: It needs a gun to apply it, but it is more economical and used by professionals.
Step by step for the correct application of silicone in the bathroom
Follow these steps to put silicone in the bathroom effectively and ensure a perfect seal:
Preparation of the area
Before applying silicone to your bathroom, it is crucial that the surface is completely clean and dry. If the previous silicone is deteriorated, you will need to remove it. To do this, apply an adhesive remover or solvent to soften it and use a spatula or cutter to peel it off. Clean the surface with an anti-mildew product, wipe with a damp cloth and dry with kitchen paper.
2. Cutting of the tube or cartridge
If using a silicone cartridge, cut the nozzle at a 45° angle for more precise application. Be sure to follow the manufacturer’s instructions to properly prepare the applicator gun.
3. Silicone application
With the gun in hand, begin by applying a continuous, even line of silicone to the areas you wish to seal. Hold the gun at a 45° angle and gently squeeze the trigger for a steady flow. It is recommended to start at the corners of the tub or shower for a cleaner finish.

4. Silicone smoothing
After applying the silicone, smooth it immediately using a smoother or simply with your finger, moistened with water. If you do it with your finger, don’t forget to wear gloves to protect your skin.
5. Remove the masking tape
To avoid stains and achieve a professional finish, you can place masking tape on both sides of the joint before applying the silicone. Once smoothed, remove the tape for clean, well-defined edges.
Additional tips for applying silicone in the bathroom
- Use masking tape: This is a very useful trick to prevent the silicone from staining unwanted areas and to achieve well-defined lines.
- Choose the right color of silicone: Be sure to select a silicone that matches the elements of your bathroom. It comes in various colors, such as white, clear and gray.
- Regular maintenance: Once the silicone is applied, it is important to keep it clean to prolong its life. Regularly clean the sealed areas to prevent mold and mildew build-up.
Applying silicone in the bathroom is a simple task that you can do yourself by following the proper steps. Choosing the right type of silicone and maintaining a uniform application guarantees an airtight bathroom, free of leaks and mold. At ParatuReforma, we offer you a wide range of sanitary silicones and tools so that you can do this job quickly and efficiently.
How often should I change the silicone in the bathroom?
Ideally, the silicone should be replaced every 2 to 5 years, or sooner if you begin to notice blackening or cracking, which indicates the presence of mold or that the seal has lost its effectiveness.
What to do if the silicone in the bathroom becomes stained or blackened?
If the silicone shows signs of mildew, you can clean it with specific products to remove it. However, if the damage is considerable, it is best to remove the old silicone and apply a new layer.
Is it possible to apply silicone without a special gun?
Yes, there are silicone tubes that do not require an applicator gun, and these are recommended for small repairs or for people who are inexperienced.


